
 English
  日本語
日本語  Deutsch
  Español




How to Vacuum Seal Glass Jars: Full Step-by-Step Guide
Content
- 1 The Direct Answer: How To Vacuum Seal Glass Jars
- 2 Why Vacuum Sealing Works: The Chemistry Behind Freshness
- 3 What You Need Before You Start
- 4 Step-By-Step: Sealing With An Electric Vacuum Sealer
- 5 Step-By-Step: Sealing With A Handheld Pump
- 6 How Much Air Removal Actually Matters
- 7 Vacuum Sealer Machine Types: External Suction Versus Chamber Sealers
- 8 The No-Equipment Method: Water Displacement For Dry Goods
- 9 Choosing The Right Glass Storage Jar For Vacuum Sealing
- 10 What Foods Actually Benefit From A Vacuum Sealed Jar
- 11 Common Mistakes That Break The Seal
- 12 Vacuum Sealing A Jar Versus Traditional Canning Versus Freezing
- 13 Storing And Monitoring Sealed Jars Over Time
- 14 Cleaning And Maintaining Your Jar Sealer Attachment
- 15 Building A Bulk Pantry System Around Vacuum Sealed Jars
- 16 Cost And Reuse Considerations
- 17 Frequently Asked Questions
- 17.1 Can any glass jar be vacuum sealed?
- 17.2 How do I know if a jar is actually sealed?
- 17.3 Can I reuse the same lid multiple times?
- 17.4 Does vacuum sealing a jar make food last forever?
- 17.5 Why did my jar lose its seal after a few days?
- 17.6 Is the water displacement method as good as a machine seal?
- 17.7 Can I vacuum seal a jar with liquid inside?
- 17.8 How long does the sealing cycle usually take?
- 17.9 Do I need a different attachment for every jar size?
- 17.10 Can vacuum sealed jars be opened and resealed repeatedly?
- 17.11 Is it normal for the lid to make a popping sound?
- 17.12 Why does my jar fog up after sealing?
- 17.13 Can metal lids rust after repeated vacuum sealing?
The Direct Answer: How To Vacuum Seal Glass Jars
The fastest reliable way to vacuum seal a glass jar is to fit a jar sealer attachment onto a countertop vacuum sealing machine, place a wide-mouth Glass Storage Jar filled with dry food underneath it, and run the suction cycle until the lid clicks down flat. The process pulls roughly 99% of the air out of the jar in under 30 seconds, and the flat, sucked-down lid is the visual proof the seal worked. If you do not own a vacuum sealer, a handheld pump with a jar attachment or a controlled boiling-water method can get you most of the way there, though neither pulls quite as much air as a full machine cycle.
Three practical routes exist, and the right one depends on what equipment sits in your kitchen drawer right now:
- An electric vacuum sealer with a jar attachment kit — the most consistent seal, best for regular pantry use
- A handheld manual pump with a jar lid adapter — slower, but portable and inexpensive
- A hot-water displacement method for dry goods only — no equipment needed, weaker and shorter-lived seal
Whichever route you pick, the underlying goal is the same: strip oxygen out of the headspace above the food so the chemical reactions that dull flavor, dry out texture, and invite pantry pests slow down dramatically. A jar that looks identical to an unsealed one on the shelf can behave completely differently once the air inside it has been pulled out, which is why so many people notice a real difference in coffee, spices, and grains once they switch to a sealed Glass Storage Jar instead of a jar with a loose screw-top lid.
Why Vacuum Sealing Works: The Chemistry Behind Freshness
Food does not spoil in a vacuum, at least not the way it spoils sitting in open air. Oxygen is the trigger for two of the main processes that ruin pantry staples over time: oxidation and moisture-driven microbial growth. Oxidation is the slow chemical reaction between oxygen molecules and the fats, oils, and aromatic compounds in food. It is the same reaction that turns a cut apple brown or makes an opened bag of chips taste stale after a week. Coffee is especially sensitive because roasted beans are full of volatile aromatic oils that react with oxygen almost immediately after the bag is opened, which is why coffee loses noticeable flavor within days of exposure to air.
Removing the air inside a jar does not just slow oxidation, it also removes the oxygen that certain pantry pests and mold spores need to establish themselves. Weevils, pantry moths, and many mold species require oxygen to reproduce and spread. A jar with the air pulled out is a much less hospitable environment for both, which is one of the practical reasons flour, rice, and dried beans stored in a sealed jar tend to stay pest-free for longer stretches than the same food left in its original paper or plastic packaging.
There is a limit to what a vacuum can do, though. It has almost no effect on enzymatic browning in fresh produce, it does nothing to stop the growth of bacteria that do not require oxygen, and it cannot reverse moisture that is already trapped inside a food before sealing. That is the core reason vacuum sealing is framed around dry pantry goods throughout this guide rather than fresh or cooked food sitting at room temperature.
What You Need Before You Start
Vacuum sealing a jar is only as good as the parts you use. A mismatched lid or a narrow, tapered jar mouth is the single biggest reason a seal fails within a day or two. Before starting, lay out every piece you plan to use and check it against the list below rather than assuming whatever is in the drawer will fit.
Vacuum source
A countertop vacuum sealer with a hose port, or a handheld pump that threads onto a jar attachment. Bag-only sealers without a hose port cannot seal jars.
Jar attachment
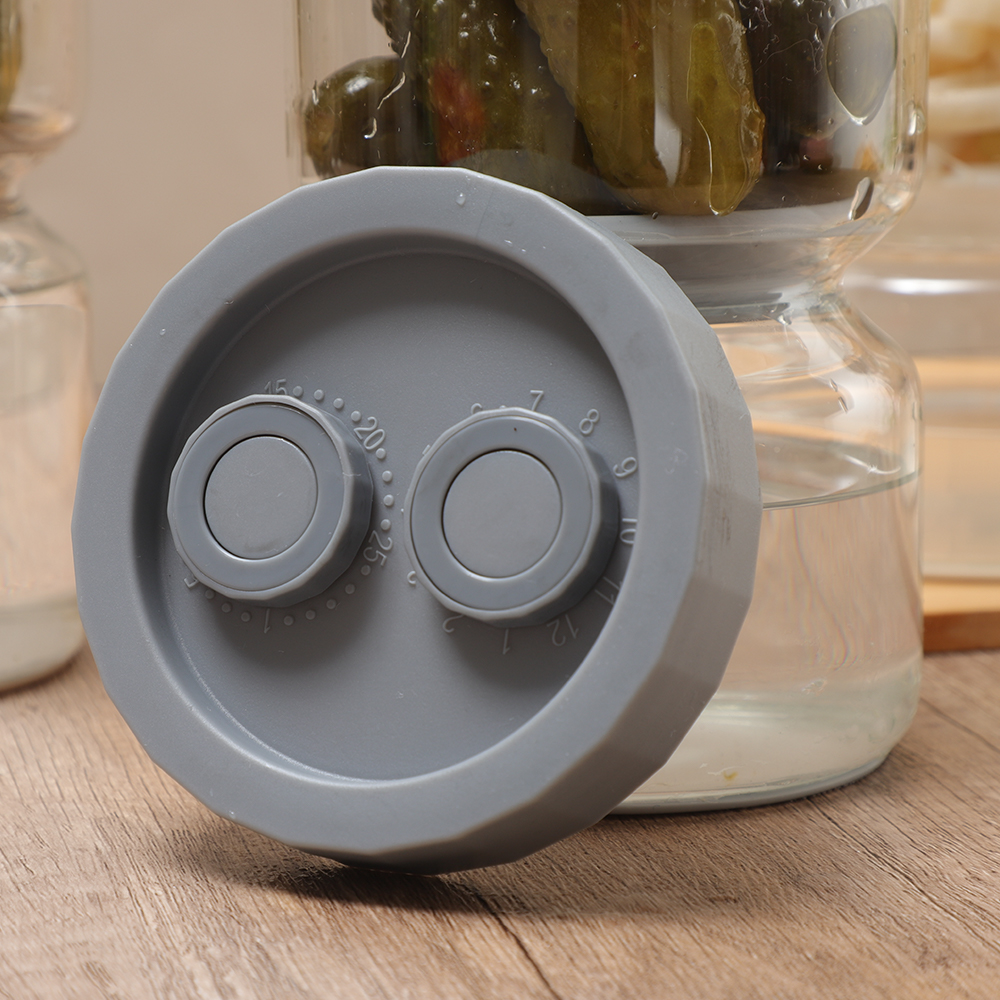
A plastic sealer disc sized to your jar mouth — regular mouth and wide mouth are sold as separate pieces and are not interchangeable.
The right jar
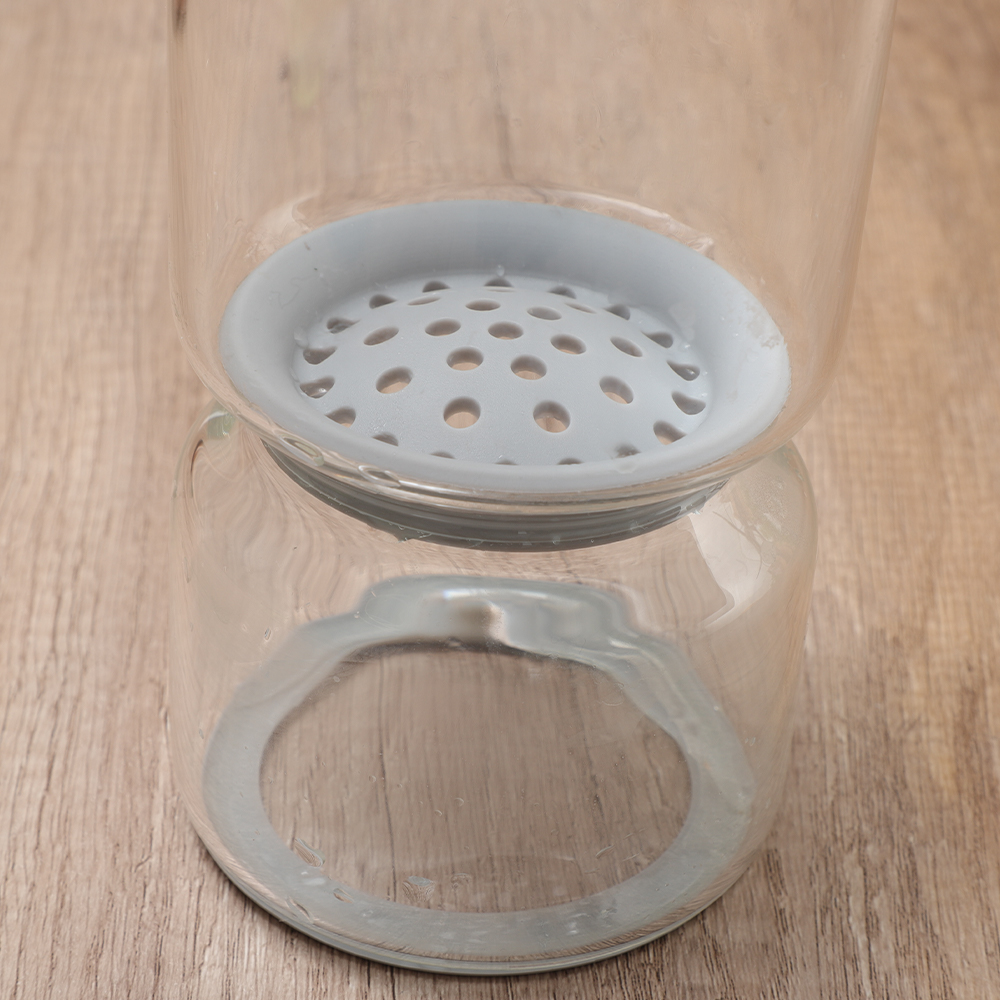
A straight-sided, wide-mouth Glass Storage Jar with an unchipped rim. Chips and hairline cracks around the rim are the most common cause of a seal that will not hold.
A flat lid
A single flat metal lid or a reusable silicone-gasket lid built for vacuum use. Two-piece canning lids can work once, but the rubber compound is designed for a one-time heat seal, not repeated suction cycles.
A soft cloth
Kept nearby to wipe the rim dry immediately before sealing. A dedicated cloth used only for this step avoids picking up oil or lint from a kitchen towel that has been used elsewhere.
None of these pieces are expensive individually, but together they determine whether a seal holds for a week or for the better part of a year. Spending a few extra minutes checking rim condition and attachment fit before every session pays off far more than upgrading to a more powerful machine.
Step-By-Step: Sealing With An Electric Vacuum Sealer
- Fill the jar with dry, room-temperature food, leaving at least half an inch of headspace below the rim.
- Wipe the rim completely dry — any crumbs, oil, or moisture on the glass will let air leak back in after the cycle ends.
- Set the flat lid on top of the jar, centered, without the metal band or ring attached.
- Place the jar sealer attachment over the lid and press down until it seats flush against the rim.
- Connect the hose from the vacuum sealer to the attachment and start the machine's canister or jar cycle.
- Listen for the motor to stop automatically, then lift the attachment straight up. The lid should sit noticeably lower and feel rigid, not springy, when pressed in the center.
A full cycle on most countertop machines takes between 15 and 40 seconds. If the lid still flexes under a fingertip afterward, reseat the attachment and run a second cycle before storing the jar.
Step-By-Step: Sealing With A Handheld Pump
- Screw or snap the jar-lid attachment onto the wide-mouth jar in place of a standard lid.
- Fit the handheld pump nozzle into the valve on top of the attachment.
- Pump in short, even strokes until resistance increases sharply and the pump stops moving air — usually 15 to 25 strokes depending on jar size.
- Remove the pump. The one-way valve on the attachment holds the vacuum in place.
Handheld pumps remove less air than an electric sealer, generally in the 80 to 90% range rather than close to full vacuum, so treat the seal as shorter-term — good for a week or two of freshness rather than long pantry storage.
How Much Air Removal Actually Matters
Not every vacuum level performs the same job, and understanding the rough tiers helps set expectations for how long a given seal will realistically protect the food inside.
| Approximate Air Removed | Typical Source | Practical Effect |
|---|---|---|
| 95 to 99% | Electric countertop sealer | Longest freshness window, rigid lid, best for long-term pantry storage |
| 80 to 90% | Handheld manual pump | Noticeable freshness improvement, best for weekly-use jars |
| 50 to 70% | Hot-water displacement | Short-term boost only, best treated as a stopgap rather than long-term storage |
It is worth noting that going from 90% to 99% air removal matters more than the numbers might suggest at first glance, because the remaining oxygen after a partial vacuum is still enough to sustain slow oxidation over months. A jar sitting at 90% air removal will still visibly outperform an unsealed jar, but it will not match the shelf life of one sealed closer to full vacuum with an electric machine.
Vacuum Sealer Machine Types: External Suction Versus Chamber Sealers
Home kitchens almost always use external suction sealers, but it helps to understand where they sit relative to the chamber-style machines used in some commercial kitchens, since the difference explains a lot about why home results vary.
| Type | How It Works | Jar Sealing Fit |
|---|---|---|
| External suction sealer | A hose pulls air out through a port or attachment while the jar sits outside the machine | Compatible with jar sealer attachments, the standard choice for home kitchens |
| Chamber sealer | The entire jar and lid sit inside a sealed chamber that has air pumped out of the whole space | Not designed around handheld jar attachments, more common in commercial food prep settings |
The No-Equipment Method: Water Displacement For Dry Goods
This method works only for jars packed with dry, non-perishable goods like rice, beans, pasta, flour, or whole spices, and it produces a weaker, shorter-lived seal than a mechanical pump. Skip it for anything with moisture content, since trapped humidity under a warm lid encourages mold rather than preventing it.
- Fill the jar with dry food and leave the lid resting on top, unsealed
- Set the jar in a pot of water that reaches just below the rim, without letting water touch the lid opening
- Bring the water to a gentle simmer for about 10 minutes so the air inside the jar heats and expands
- Lift the jar out, press the lid down firmly, and let it cool undisturbed on the counter
- As the air inside cools and contracts, the lid draws down and forms a seal — you will usually hear a soft pop
Because this method relies on temperature change rather than mechanical suction, the vacuum it creates is noticeably weaker than an electric sealer. Treat jars sealed this way as good for a few extra weeks of freshness, not the months of shelf life a proper vacuum sealer can provide.
Choosing The Right Glass Storage Jar For Vacuum Sealing
Not every jar in the cupboard is built for this. The shape of the mouth and the thickness of the rim determine whether an attachment can form an airtight contact point at all.
| Jar Style | Seal Reliability | Best Use |
|---|---|---|
| Wide-mouth straight-sided jar | High | Everyday pantry sealing, coffee, grains |
| Regular mouth jar | Moderate | Spices, small-batch herbs |
| Shouldered or tapered jar | Low | Decorative storage, not recommended for vacuum sealing |
Thicker glass around the rim also resists the repeated pressure of attaching and removing a sealer disc better than thin decorative jars. If you plan to reseal the same Glass Storage Jar weekly, a heavier rim will simply last longer under that use.
Jar size matters almost as much as shape. Smaller jars in the half-pint to pint range reach full vacuum faster and hold less residual air relative to the food inside, which is part of why they are the default choice for spices and small quantities of coffee. Larger quart-sized jars take slightly longer to reach the same vacuum level and have proportionally more headspace air to remove, so expect a marginally longer cycle time on a full quart jar compared with a half-pint one.
Clear glass and tinted glass perform the same job mechanically, but tinted or amber glass blocks more visible light, which slows down light-driven flavor degradation in products like ground spices, dried herbs, and whole coffee beans. If a jar will sit somewhere with regular sun exposure, such as an open shelf near a window, tinted glass is worth the small trade-off in visibility. For a cabinet that stays dark most of the day, clear glass performs just as well and makes it easier to see remaining quantity at a glance.
What Foods Actually Benefit From A Vacuum Sealed Jar
Vacuum sealing slows oxidation, which is what makes coffee go stale, spices lose potency, and grains pick up a flat taste. It does very little against moisture-driven spoilage, so wet or fresh foods need refrigeration regardless of whether the jar is sealed.
| Food | Unsealed Jar | Vacuum Sealed Jar |
|---|---|---|
| Whole coffee beans | 2 to 3 weeks of peak flavor | 2 to 3 months of peak flavor |
| Ground spices | 6 to 12 months | 18 to 24 months |
| Rice and dried grains | 6 to 12 months | 1 to 2 years |
| Nuts | 1 to 2 months at room temperature | 4 to 6 months at room temperature |
| Dried herbs | 6 months | 12 to 18 months |
Fresh produce, cooked leftovers, and anything with high moisture content are poor candidates for jar vacuum sealing at room temperature — they belong in the refrigerator regardless of the seal, since trapped moisture inside an airtight jar can actually accelerate mold growth rather than prevent it.
Common Mistakes That Break The Seal
Most failed seals trace back to one of a handful of repeatable errors, and almost all of them are avoidable once you know what to check before starting the cycle.
- A wet or greasy rim — even a thin film of oil stops the lid from gripping the glass evenly, so wipe the rim with a dry cloth immediately before placing the lid, not several minutes earlier
- Overfilling the jar — food touching the underside of the lid blocks airflow through the attachment and the cycle stops early, so leave at least half an inch of clear headspace every time
- Reusing a stretched or torn gasket — silicone gaskets lose their shape after repeated cycles and need replacing every few months of regular use; a gasket that no longer looks perfectly round is due for replacement
- Using a chipped jar — a rim chip as small as a grain of rice is enough to let air leak back in within hours; run a fingertip slowly around the entire rim before every use to check
- Skipping the press test — always press the center of the lid before storing; if it flexes or clicks, the jar did not seal and needs a second cycle
- Sealing warm food — hot or even lukewarm food releases moisture as it cools inside a sealed jar, which can fog the glass and encourage mold; let food cool to room temperature first
- Mismatched attachment size — forcing a regular-mouth attachment onto a wide-mouth jar, or the reverse, rarely forms a complete seal even when the machine runs a full cycle
- Storing jars somewhere they get knocked or jostled — repeated small impacts can loosen a seal at the rim over weeks, so keep sealed jars in a stable spot rather than a high-traffic shelf edge
Vacuum Sealing A Jar Versus Traditional Canning Versus Freezing
These three methods get grouped together in conversation constantly, but each one solves a different storage problem and none of them is a full substitute for the others.
| Factor | Vacuum Sealed Jar | Traditional Canning | Freezing |
|---|---|---|---|
| How the seal or preservation forms | Mechanical air removal | Heat processing followed by cooling | Low temperature slows microbial activity |
| Typical contents | Dry pantry goods | Cooked or acidic wet foods | Almost any food, wet or dry |
| Equipment | Vacuum sealer or pump with jar attachment | Water bath or pressure canner | Freezer, freezer-safe containers |
| Time to complete | Under a minute per jar | Often an hour or more including processing time | A few minutes of prep, storage is ongoing |
| Best suited for | Extending freshness of dry pantry staples at room temperature | Long-term shelf-stable storage of cooked or preserved wet foods | Long-term storage of perishable or cooked foods |
A useful way to think about the three side by side: vacuum sealing buys extra time on food that would already be shelf-stable, canning creates a new shelf-stable product out of something that would otherwise need refrigeration, and freezing pauses spoilage on almost anything by slowing the biological and chemical processes involved rather than removing oxygen or applying heat. None of them substitutes for proper refrigeration of foods that genuinely need to stay cold.
Storing And Monitoring Sealed Jars Over Time
Once a jar is sealed, keep it in a cool, dark cabinet away from direct sunlight and the heat radiating off an oven or stovetop — both light and warmth speed up the flavor loss that vacuum sealing is meant to slow down.
- Press the center of the lid every few weeks; a rigid, unmoving lid means the seal is still holding
- Label each Glass Storage Jar with the sealing date so older jars get used first
- If a lid pops back up or flexes when pressed, treat the contents as no longer vacuum sealed and use them soon or reseal
- Avoid stacking heavy items directly on top of sealed jars, since pressure on the lid can gradually break the seal at the rim
Cleaning And Maintaining Your Jar Sealer Attachment
The attachment itself rarely gets the same attention as the jar or the lid, but a dirty or worn attachment is a quiet cause of inconsistent seals over time. Food residue, spilled crumbs, or a build-up of dust inside the suction channel can reduce how much air the machine is actually able to pull through, even when the motor sounds like it is running normally.
- Wipe the underside of the attachment after every use, especially if it made contact with a lid that had any residue on it
- Rinse the gasket separately from the hard plastic housing, using warm water rather than a dishwasher, since high heat can warp the shape of the seal over repeated cycles
- Let all parts air dry completely before storing them together, since trapped moisture inside the housing can promote mold growth in the attachment itself
- Inspect the gasket under good light every month or two of regular use, checking for flattening, cracking, or a dull, matte texture where it should still look slightly glossy
- Keep a spare gasket on hand if jars get sealed weekly, since replacing a worn part takes seconds and costs far less than the food that spoils from a failed seal
Building A Bulk Pantry System Around Vacuum Sealed Jars
Once the basic technique is comfortable, many people naturally move from sealing single jars occasionally to running a small rotating system across a whole pantry shelf. A few habits make that transition smoother and keep the extra shelf life from going to waste.
Buy in portions that match jar sizes
Instead of sealing one oversized jar of rice or flour, split a bulk bag across two or three smaller jars. Smaller jars reach a deeper vacuum more reliably, and opening one jar at a time exposes far less of the total supply to air compared with repeatedly opening and closing one large container.
Keep an active jar and a reserve jar
Designate one open jar for daily use and leave the rest sealed in reserve. This keeps most of the supply protected while only the jar in current rotation is exposed to regular air contact from opening and closing.
Label with contents and date
A simple strip of masking tape with the food name and the sealing date is enough to keep a first-in, first-out rotation working. Without a date, it becomes easy to lose track of which jar has been sitting the longest.
Group jars by how often they get opened
Store jars that get opened daily, like coffee or a frequently used spice, toward the front of the shelf, and keep long-term reserve jars further back where they are less likely to be bumped or handled unnecessarily.
Cost And Reuse Considerations
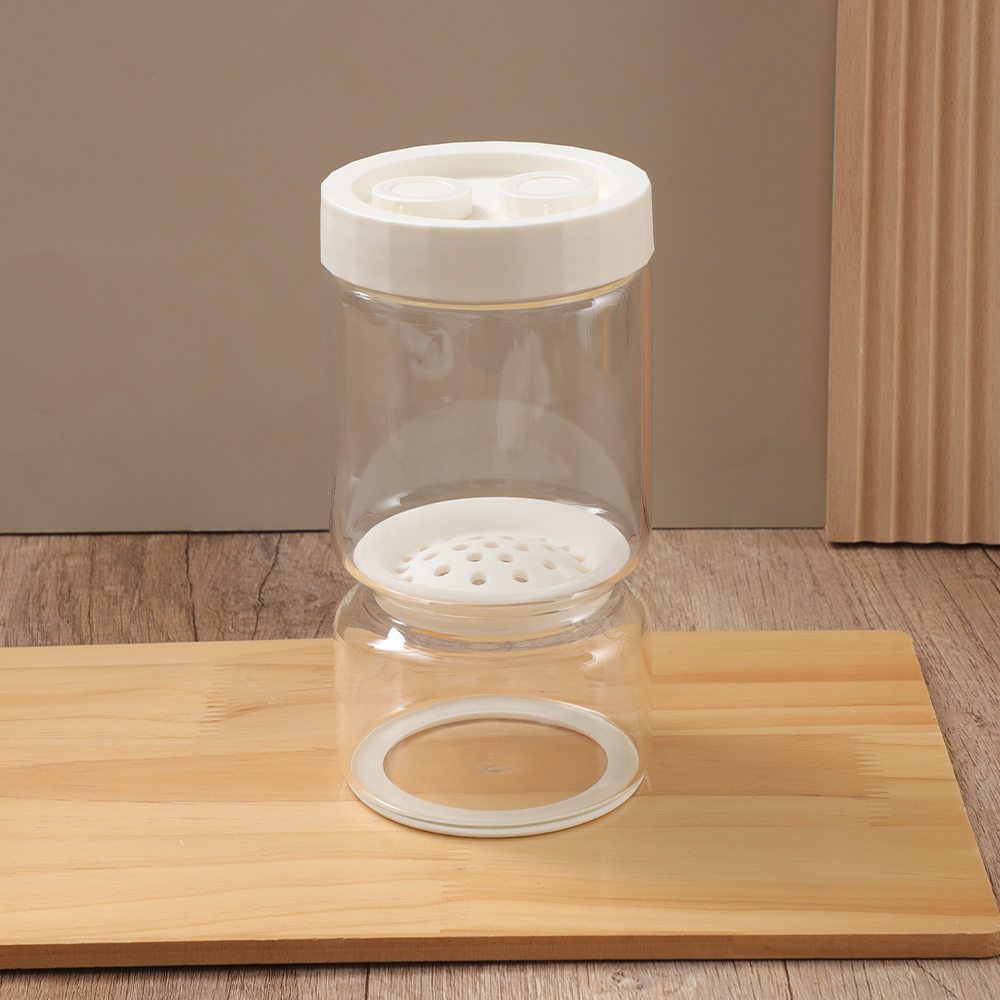
A glass jar and a reusable lid represent a one-time cost that can be sealed and resealed hundreds of times over its lifespan, which sets it apart from single-use vacuum bags that get discarded once opened. Over months of regular pantry use, the price difference between disposable bags and a small collection of reusable jars tends to even out, and after that point, jars become the cheaper option per sealing cycle.
Glass also does not absorb odors or stain the way some plastics can after storing strongly scented spices or oily foods, so a jar that has held cumin one month can be washed and reused for something completely different the next without carrying over flavor. That reusability is part of why glass jars remain a common choice for people who seal food regularly rather than occasionally, even when a plastic container might be marginally cheaper to buy outright.
Frequently Asked Questions
Can any glass jar be vacuum sealed?
Not reliably. The jar needs a straight, wide, undamaged rim that matches a sealer attachment. Narrow-neck bottles and shouldered decorative jars rarely form a consistent seal.
How do I know if a jar is actually sealed?
Press the center of the lid. A properly sealed jar has a lid that stays flat and rigid with no give. If it flexes, pops, or clicks under light pressure, the seal did not hold.
Can I reuse the same lid multiple times?
A silicone-gasket lid designed for repeated vacuum sealing can be reused many times, but it should be replaced once the gasket looks stretched, cracked, or no longer sits flush. A one-time metal canning lid is best treated as single-use.
Does vacuum sealing a jar make food last forever?
No. It slows oxidation and flavor loss for dry goods, which extends shelf life significantly, but it does not stop spoilage in moist or perishable foods and does not replace refrigeration for anything that would normally need it.
Why did my jar lose its seal after a few days?
The most common causes are a rim that was not completely dry before sealing, a chip in the glass, an overfilled jar that blocked the attachment's airflow, or a worn gasket that no longer grips evenly.
Is the water displacement method as good as a machine seal?
It gets close for short-term freshness on dry goods but pulls noticeably less air than an electric sealer. Treat it as a few extra weeks of protection rather than a long-term pantry solution.
Can I vacuum seal a jar with liquid inside?
Liquids and moist foods are a poor match for jar vacuum sealing at room temperature, since trapped moisture under an airtight lid can encourage mold rather than prevent spoilage. Keep liquids and wet foods refrigerated regardless of the seal.
How long does the sealing cycle usually take?
An electric sealer typically finishes a jar cycle in 15 to 40 seconds. A handheld pump takes closer to a minute of manual pumping. The water displacement method takes about 10 minutes of simmering plus cooling time.
Do I need a different attachment for every jar size?
You need the correct mouth width — regular or wide mouth — but one attachment of the right width generally works across different jar heights within that mouth category, so a single wide-mouth attachment can typically handle both half-pint and quart wide-mouth jars.
Can vacuum sealed jars be opened and resealed repeatedly?
Yes, as long as the lid and gasket remain in good condition. Each time the jar is opened, simply wipe the rim dry again and run another sealing cycle to restore the vacuum.
Is it normal for the lid to make a popping sound?
A soft pop or click as the lid seats down is normal and often a good sign that a seal has formed, particularly with the hot water method. With an electric sealer, the sound is usually quieter since the process happens gradually rather than through a temperature change.
Why does my jar fog up after sealing?
Fogging usually means the food or the jar was not fully cooled to room temperature before sealing, or that the food itself carried more residual moisture than expected. Let food cool completely and make sure the jar is dry inside before filling it next time.
Can metal lids rust after repeated vacuum sealing?
Metal lids can develop rust over time if they are exposed to humidity between uses or washed and stored while still damp. Drying lids fully before storing them, and switching to a silicone-gasket lid for jars sealed very frequently, avoids this issue.
Recommended Products


- PRODUCT
- Glass Storage Jar
- Glass/Stainless Steel Drinking ware
- Kitchen Seasoning Containers
- Home Decoration
- QUICK LINKS
- Products
- About Us
- Manufacture
- ODM/OEM
- News
- Contact Us
- CONTACT US
-
-
 7 Crystal Boulevard xi’an Feng Town, Baoying County,Jiangsu, China.
 -
 WhatsApp:
+86-18083783456
+86-15005252638 -
 +86-18083766162
+86-18083783456
+86-15895746638
+86-0514-8866-8898
-
 julia@nchousewares.com
Jack@nchousewares.com
joy@nchousewares.com
-
- CONTACT

