
 English
  日本語
日本語  Deutsch
  Español


How to Vacuum Seal a Mason Jar: Tools, Steps & Storage Tips
Content
- 1 The Short Answer: How to Vacuum Seal a Mason Jar
- 2 What Equipment You Actually Need
- 3 Step-by-Step Instructions for Vacuum Sealing a Mason Jar
- 4 What Foods Work Best in a Vacuum Storage Jar
- 5 Vacuum Sealing vs. Other Storage Methods: How They Actually Compare
- 6 Common Mistakes That Prevent a Proper Vacuum Seal
- 7 How Long Does a Vacuum Sealed Mason Jar Actually Last?
- 8 Oxygen Absorbers vs. Vacuum Sealing: Do You Need Both?
- 9 Using a Vacuum Storage Jar in the Freezer: What Works and What Doesn't
- 10 Maintaining and Resealing Your Vacuum Storage Jar Collection
- 11 Practical Tips That Make the Process Faster and More Reliable
The Short Answer: How to Vacuum Seal a Mason Jar
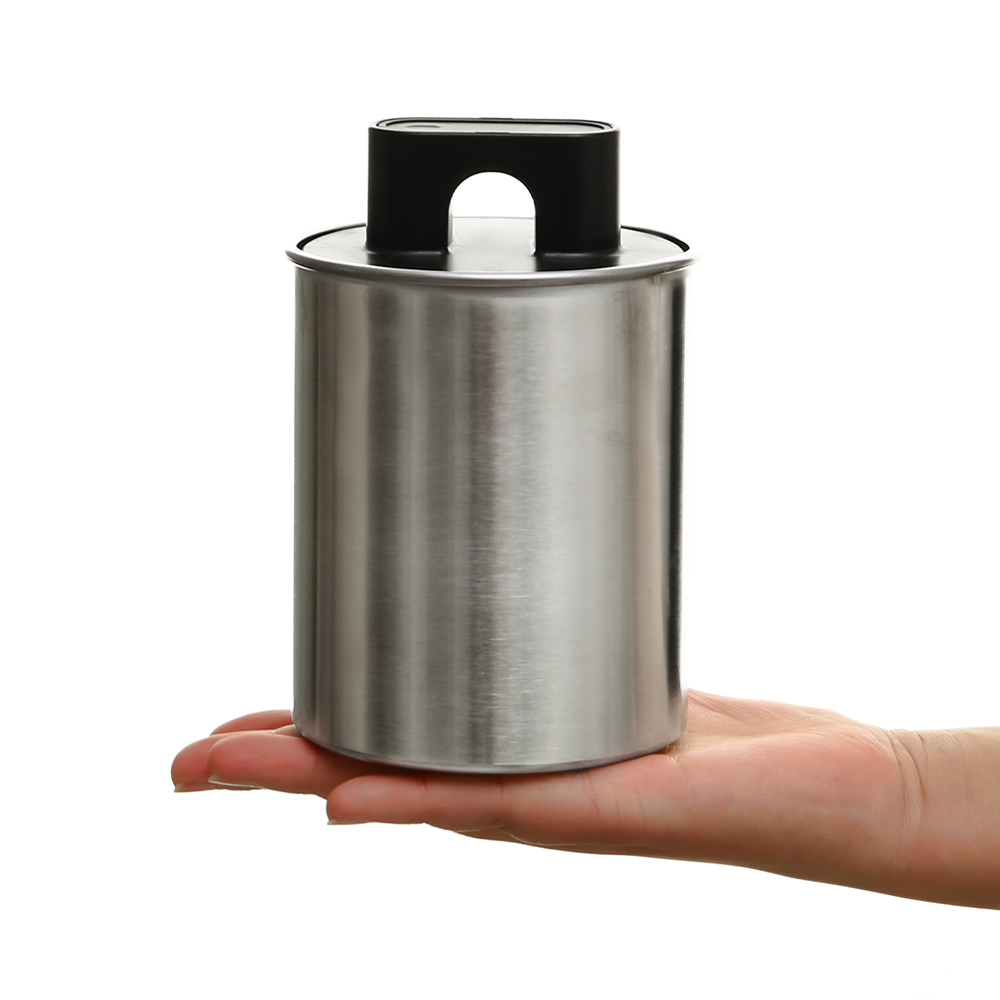
To vacuum seal a mason jar, you need either a vacuum sealer machine with a jar attachment, a handheld vacuum pump kit designed for mason jars, or a FoodSaver-style device with a hose adapter. Fill the jar with your food or dry goods, place a new lid on top (no ring required for vacuum sealing), attach the jar sealer accessory over the lid, and run the vacuum until the lid is firmly sucked down and clicks into place. The entire process takes under two minutes per jar. Once sealed correctly, the lid should not flex when pressed in the center — that resistance is your confirmation that a proper vacuum has formed inside the Vacuum Storage Jar.
This method extends shelf life dramatically. Dry goods like flour, coffee, and rice that typically last 6–12 months in open containers can remain fresh for 2 to 5 years when vacuum sealed in glass mason jars. For perishable items in the refrigerator, vacuum sealing can triple or quadruple standard storage time.
What Equipment You Actually Need
Getting the right tools matters more than technique. Fortunately, vacuum sealing mason jars does not require expensive, professional-grade machinery. There are three main routes, each with its own cost, convenience level, and ideal use case.
Option 1 – FoodSaver or Similar Vacuum Sealer with a Jar Sealer Attachment
The most widely used method. FoodSaver sells wide-mouth and regular-mouth jar sealer attachments that connect directly to their machines via a hose port. The machine pumps air out automatically and stops when it detects the target vacuum level. These attachments typically cost $12–$20 and are compatible with Ball, Kerr, and most standard mason jars. The vacuum sealer machine itself ranges from $60 to $200 depending on features.
This setup is ideal if you already own a FoodSaver or plan to vacuum seal bags as well. The automation makes it foolproof — no guesswork about whether you have pulled enough air out.
Option 2 – Handheld Electric Vacuum Pump for Mason Jars
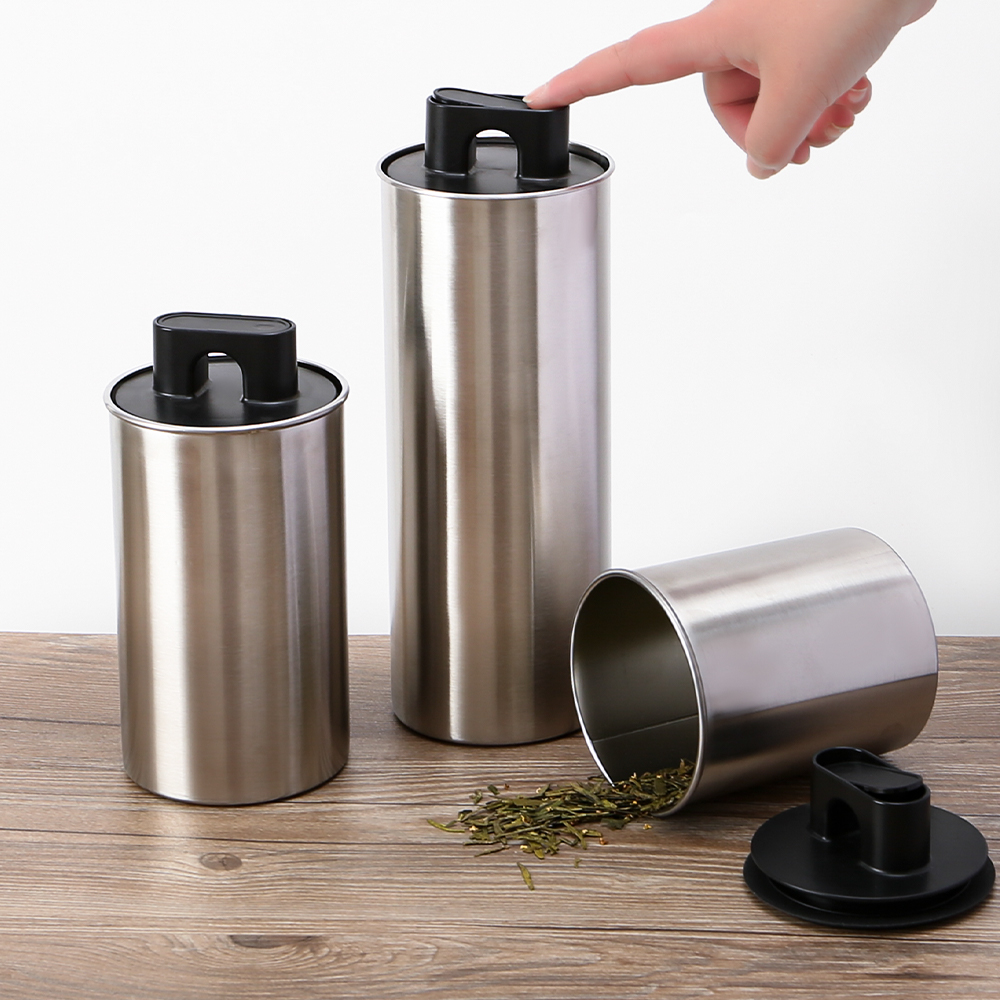
Compact, rechargeable handheld vacuum pumps designed specifically for vacuum storage jar lids have become extremely popular. Brands like Zwilling Fresh & Save, Anova, and various Amazon-sold options offer small USB-rechargeable devices that sit directly on the jar lid and pump until sealed. Most run on a single charge for 200–400 seals. Prices range from $25 to $60 for the pump, often sold with specialty lids.
These are best for kitchen countertop use — sealing leftover jars of pasta, nuts, spices, or refrigerator items quickly without pulling out a large machine.
Option 3 – Manual Hand Pump with Hose and Adapter
The most budget-friendly option. Manual hand pump kits — often sold for $10–$18 — include a small bicycle-style pump, a short hose, and one or two mason jar lid adapters. You place the adapter over the lid and manually pump until resistance tells you the air is gone. These work well but require more physical effort and take slightly longer per jar.
They are a good emergency backup or a starter option for people who want to try vacuum sealing before investing in a powered device.
| Method | Approximate Cost | Best For | Ease of Use |
|---|---|---|---|
| FoodSaver + jar attachment | $12–$20 (attachment only) | Bulk sealing, long-term storage | Very Easy |
| Handheld electric pump | $25–$60 | Daily kitchen use, refrigerator jars | Very Easy |
| Manual hand pump kit | $10–$18 | Beginners, occasional use | Moderate |
Step-by-Step Instructions for Vacuum Sealing a Mason Jar
No matter which tool you use, the core process follows the same sequence. Getting each step right is the difference between a seal that lasts years and one that fails within days.
Step 1 – Choose the Right Jar and Lid
Use standard two-piece mason jar lids — a flat disc lid and a screw band. Always use a new, unused flat lid for vacuum sealing. Lids that have been previously used in hot water bath canning may have compromised sealing compound and will not hold a vacuum reliably. The jar itself can be reused indefinitely as long as it has no chips or cracks on the rim. Even a hairline crack on the rim will prevent a proper seal.
Make sure your jar size matches your sealer attachment. Most jar sealer attachments come in two sizes: wide-mouth (86mm) and regular-mouth (70mm). Using a wide-mouth attachment on a regular-mouth jar will not work.
Step 2 – Fill and Prepare the Jar
Fill the jar with your food, leaving at least half an inch of headspace at the top. This is critical — the lid needs room to flex inward as the vacuum pulls it down. Overfilled jars may have food particles on the rim that break the seal. Wipe the rim clean with a dry cloth before placing the lid.
For powdery items like flour, protein powder, or ground coffee, leave slightly more headspace — about 1 inch — since fine particles can be drawn up toward the lid during vacuuming and interfere with the seal.
Step 3 – Place the Lid (Disc Only — No Ring Needed)
Place the flat disc lid on top of the jar. Do not screw the band on yet — the band is not needed during the vacuum sealing process. The vacuum itself is what holds the disc lid down. Adding the ring first makes it harder for some jar sealer attachments to fit properly.
Step 4 – Attach the Jar Sealer and Run the Vacuum
Place the jar sealer accessory directly over the lid, centered on the jar mouth. Connect the hose to your vacuum machine (or press the button on a handheld device). Run the vacuum until you hear or feel the seal complete. With FoodSaver machines, the device will stop automatically. With manual pumps, stop when you feel strong resistance and the pump no longer draws air.
The process typically takes 20 to 60 seconds per jar depending on the jar size and the device's power.
Step 5 – Verify the Seal and Add the Band
Remove the sealer attachment and press the center of the lid with your finger. It should feel rigid and not flex or click. If it pops up and down, the seal has not held — try again with a fresh lid. Once confirmed, screw the band on finger-tight. The band protects the lid during storage and handling but does not affect the vacuum inside.
Label the jar with the contents and date, then store it in a cool, dark location for maximum shelf life.
What Foods Work Best in a Vacuum Storage Jar
Vacuum sealing mason jars is exceptionally versatile, but not every food benefits equally. Understanding what works — and what does not — saves time and prevents wasted product.
Dry Goods — The Primary Use Case
Dry pantry staples benefit the most from a vacuum sealed mason jar environment. Removing oxygen prevents oxidation, rancidity, and pest infestation. The following dry goods store exceptionally well:
- Whole-bean and ground coffee — freshness maintained 2–3x longer compared to an open bag
- White rice, quinoa, lentils, and dried beans — shelf life extended from 2 years to 5+ years
- All-purpose flour and whole wheat flour — prevents rancidity in whole grain flours
- Nuts and seeds — oils in nuts go rancid quickly in air; vacuum sealing extends freshness from 3 months to over a year
- Dried pasta and oats
- Spices and dried herbs — flavor retention improved significantly
- Sugar and brown sugar — prevents clumping and hardening
- Dehydrated fruits and vegetables
Refrigerator and Short-Term Use
A vacuum sealed mason jar is also excellent for refrigerator storage of perishables. The reduced oxygen environment slows bacterial growth and oxidation. Practical refrigerator applications include:
- Salad greens and cut vegetables — stay crisp up to 10–14 days vs. 3–5 days unsealed
- Leftover soups, stews, and sauces
- Shredded cheese — up to 3 weeks instead of 1
- Sliced fruits — avocado, apples, peaches
- Marinating meat — the vacuum forces marinade into the meat fibers in 30 minutes vs. overnight
- Opened wine — slows oxidation and extends quality by 3–5 days
Foods That Should NOT Be Vacuum Sealed in Mason Jars
Vacuum sealing is not appropriate for all foods. Avoid the following:
- Raw mushrooms, garlic in oil, or low-acid vegetables — these can harbor anaerobic bacteria (including Clostridium botulinum) in low-oxygen conditions if stored at room temperature without proper canning
- Soft cheeses and fermented foods where off-gassing is part of the process
- Freshly baked goods with high moisture content — these need to cool completely first to avoid condensation inside the jar
- Carbonated beverages
Vacuum sealing in mason jars is not the same as pressure canning or boiling water bath canning. It does not make room-temperature storage of perishable, low-acid foods safe. Use vacuum sealed mason jars as a supplement to proper refrigeration or canning — not as a replacement.
Vacuum Sealing vs. Other Storage Methods: How They Actually Compare
To understand the real value of a vacuum sealed mason jar, it helps to compare it side-by-side with the alternatives most people already use at home.
| Storage Method | Coffee (Ground) Freshness | Rice Shelf Life | Nuts Freshness | Cost of Container |
|---|---|---|---|---|
| Original sealed bag | 2–4 weeks after opening | 1–2 years | 1–3 months | Included with product |
| Standard airtight container | 3–5 weeks | 2 years | 3–6 months | $5–$25 |
| Vacuum sealed plastic bag | 2–3 months | 3–5 years | 12–18 months | $0.50–$1 per bag |
| Vacuum Storage Jar (mason jar) | 3–6 months | 5+ years | 12–24 months | $1–$3 per jar (reusable) |
The vacuum sealed mason jar approach edges out plastic vacuum bags in several practical ways. Glass is non-porous, so it does not absorb flavors or odors over time. It can be washed and reused hundreds of times. It stores without concern about plasticizer leaching. And because you can see the contents through the glass, you never lose track of what is stored inside.
The tradeoff is that glass jars take up more pantry space than flat vacuum bags and are heavier. For someone storing large quantities of food for emergency preparedness or a homestead pantry, a mix of both methods often makes the most sense.
Common Mistakes That Prevent a Proper Vacuum Seal
Most seal failures trace back to a small number of predictable errors. Recognizing these in advance prevents frustration and wasted lids.
Reusing Old or Bent Flat Lids
The rubber sealing compound on mason jar lids compresses when canned and does not fully recover. A lid that has been through a boiling water bath or pressure canning cycle should not be reused for vacuum sealing. The compound may have micro-gaps that prevent a solid vacuum. Always use new flat lids — they cost pennies each when bought in bulk boxes.
Food Residue or Moisture on the Jar Rim
Even a small crumb or drop of liquid on the rim prevents the lid's sealing compound from making full contact with the glass. Wipe the rim with a clean, dry cloth every single time before placing the lid. This step adds five seconds and prevents most seal failures.
Mismatched Jar Sealer Attachment Size
Wide-mouth and regular-mouth jars are not interchangeable when it comes to sealer attachments. The attachment must sit flush against the lid to create the external seal needed to draw air out. If you have both jar sizes, keep both attachment sizes on hand. This is one of the most overlooked causes of failure for new users.
Not Leaving Enough Headspace
Overfilled jars leave no room for the lid to flex downward during vacuuming. The lid physically needs to be pulled inward slightly to create and maintain the vacuum. If the food is flush with or above the rim, this movement is blocked. Half an inch minimum — one inch for powdery or loose contents.
Sealing Wet or Warm Food
Hot food creates steam inside the jar. If you vacuum seal immediately after cooking, the warm vapor has nowhere to go and will compromise the seal as the jar cools. Let all cooked or warm foods come to room temperature first, then refrigerate if needed before sealing. This also prevents condensation from forming inside the vacuum sealed mason jar during temperature fluctuations.
Not Checking the Seal After Removal
The vacuum seal on a mason jar can sometimes release silently right after the attachment is removed if the lid had a small defect or the rim was not perfectly clean. Always press the center of the lid with your fingertip immediately after sealing. No flex means a good seal. Any give or clicking sound means try again with a new lid.
How Long Does a Vacuum Sealed Mason Jar Actually Last?
Shelf life after vacuum sealing depends on three factors: the food itself, the storage environment, and whether the seal remains intact. The vacuum removes oxygen — the primary driver of oxidation, rancidity, mold growth, and insect activity. It does not sterilize, kill bacteria already present, or prevent moisture-related degradation in foods that were not already dry.
For dry goods stored in a cool, dark pantry with stable temperatures below 70°F (21°C), the following shelf life expectations are realistic:
- White rice and hard grains: 5–10 years (compared to 1–2 years unsealed)
- Dried beans and lentils: 5–8 years (nutritional quality declines but food remains edible)
- Ground coffee: 3–6 months at room temperature, 6–12 months in freezer
- All-purpose flour: 1–2 years (whole wheat flour: 6–12 months due to higher oil content)
- Rolled oats: 3–5 years
- Whole almonds and walnuts: 12–24 months at room temperature
- Dried herbs and spices: 3–5 years with significantly better flavor retention
Temperature is the other critical variable. Every 10°F decrease in storage temperature roughly doubles shelf life for most dry goods. A pantry that stays at 55°F year-round will outperform a 75°F kitchen cabinet significantly, even when both hold vacuum sealed mason jars.
Light degradation is real as well. While glass jars are non-porous and excellent barriers to oxygen and moisture, they are transparent. UV light accelerates degradation of sensitive foods like coffee, certain oils, and spices. Store vacuum sealed mason jars in a dark pantry, cabinet, or use colored or amber glass jars for light-sensitive contents.
Oxygen Absorbers vs. Vacuum Sealing: Do You Need Both?
A common question from people building long-term food storage is whether oxygen absorbers add meaningful benefit on top of vacuum sealing in a vacuum storage jar. The short answer is: for most purposes, vacuum sealing alone is sufficient. But the combination does offer measurable improvement in specific scenarios.
Vacuum sealing removes approximately 90–99% of the oxygen inside the jar depending on the equipment quality. Some residual oxygen remains — it is physically impossible to reach absolute zero pressure with consumer-grade equipment. Oxygen absorbers, when used inside a sealed container, continue to chemically bind any remaining oxygen until they are fully saturated.
For truly long-term storage goals — 10+ years for emergency food supplies — adding a properly sized oxygen absorber to the jar before vacuum sealing pushes the oxygen level as close to zero as practically achievable at home. A 100cc absorber is appropriate for a quart-sized jar; a 300cc absorber for a half-gallon.
For standard pantry use and food that will be consumed within 2–3 years, vacuum sealing alone provides more than adequate protection. Oxygen absorbers add cost and require careful handling (they activate on contact with air and must be used quickly once the bag is opened).
Using a Vacuum Storage Jar in the Freezer: What Works and What Doesn't
Mason jars can be used in the freezer, but vacuum sealing them and then freezing them requires a specific approach to prevent breakage. Glass does not handle sudden temperature changes well, and liquid expands as it freezes — two realities that must be accounted for.
How to Safely Freeze Vacuum Sealed Mason Jars
- Use only wide-mouth mason jars for freezing — their straight sides allow expansion without the jar shoulder catching on the frozen food as it expands
- Leave at least 1.5 inches of headspace for liquids, which expand approximately 9% when frozen
- Cool liquids completely before placing in the freezer — never put a warm vacuum sealed jar directly into a deep freeze
- For dry goods, frozen vacuum sealed mason jars work extremely well — coffee beans stored vacuum sealed in the freezer retain peak flavor for 6–12 months
- Avoid placing jars directly on freezer shelves in single-door refrigerator-freezer units where temperature fluctuations are greater — use a small tray or cloth to insulate the bottom
Frozen vacuum sealed mason jars prevent freezer burn better than zip-lock bags because glass provides a rigid barrier. Soup, stock, tomato sauce, and blanched vegetables all freeze well this way.
Maintaining and Resealing Your Vacuum Storage Jar Collection
One of the advantages of mason jars over vacuum bags is that they can be opened and resealed with a new lid repeatedly. Once you open a vacuum sealed mason jar, the old lid should be inspected before reuse. If the sealing compound is intact and the lid is not bent, it can be used again for another vacuum seal. If any deformation is visible, discard it and use a fresh lid — at roughly 10–15 cents per lid, there is no good reason to take chances.
Check your stored vacuum sealed mason jars every 3–6 months by pressing the center of each lid. Any jar whose lid has lost its rigidity has lost its vacuum and should be used or re-evaluated promptly. In practice, properly made seals on undisturbed jars in stable storage conditions almost never fail spontaneously.
Build the habit of dating jars when you seal them. A simple piece of masking tape and a permanent marker is all you need. This removes any guesswork about freshness when you reach into the pantry six months or two years later.
Stacking vacuum sealed mason jars is fine — the pressure from stacking does not affect the internal vacuum. Use the screw bands when stacking to protect the lids from physical impact. Store the heaviest jars on lower shelves and smaller or more fragile contents on higher shelves where they are less at risk from a fall.
Practical Tips That Make the Process Faster and More Reliable
After sealing dozens or hundreds of jars, a few habits emerge that make the process noticeably faster and more consistent.
- Pre-wash and dry all jars in batches. Set up a production line rather than handling one jar at a time. Fill, wipe, lid, seal, band, and label in sequence across a row of jars.
- Keep new flat lids in the box until use. Storing them loosely in a drawer risks small dings in the sealing compound rim that are invisible but cause seal failures.
- Use a canning funnel. A wide-mouth canning funnel keeps powdery contents like flour and sugar off the jar rim during filling — eliminating the most common cause of failed seals in a single step.
- Store your jar sealer attachments with your mason jars so they are always at hand when you need them.
- For very fine powders like protein powder or baking soda, lay a small square of plastic wrap loosely over the jar opening before placing the lid. This stops powder from being drawn up into the lid's sealing compound during vacuuming.
- Seal in cool conditions. Sealing on a hot summer day in a warm kitchen means the air inside the jar is warm and expanded. As the jar cools to room temperature, the vacuum will feel slightly less firm — sealing in a cooler environment gives you a tighter baseline vacuum.
- Buy lids in bulk. A 50-pack of regular-mouth or wide-mouth lids typically costs $6–$10 and gives you the freedom to reseal without hesitation.
Recommended Products
")


")


- PRODUCT
- Glass Storage Jar
- Glass/Stainless Steel Drinking ware
- Kitchen Seasoning Containers
- Home Decoration
- QUICK LINKS
- Products
- About Us
- Manufacture
- ODM/OEM
- News
- Contact Us
- CONTACT US
-
-
 7 Crystal Boulevard xi’an Feng Town, Baoying County,Jiangsu, China.
 -
 WhatsApp: +86-18083783456
 -
 +86-18083766162
+86-18083783456
+86-15895746638
+86-0514-8866-8898
-
 julia@nchousewares.com
Jack@nchousewares.com
-
- CONTACT

