
 English
  日本語
日本語  Deutsch
  Español


How to Organize Glass Tupperware and Glass Storage Jars?
Content
- 1 How to Organize Glass Tupperware: The Short Answer
- 2 Start With a Full Audit Before You Organize Anything
- 3 The Three Main Methods for Organizing Glass Containers in a Cabinet
- 4 Comparing Organization Methods at a Glance
- 5 How to Organize Glass Storage Jars Specifically
- 6 Cabinet-Specific Tips That Make the System Stick
- 7 Habits That Keep Glass Tupperware Organized Long-Term
- 8 The Best Organizer Tools for Glass Containers and Jars
- 9 Common Organizing Mistakes and How to Avoid Them
- 10 Organizing Glass Containers in the Refrigerator and Freezer
- 11 What Size and Style of Glass Container to Keep in Your Collection
How to Organize Glass Tupperware: The Short Answer
The most effective way to organize glass tupperware is to separate lids from containers, nest containers by size, and store lids vertically in a dedicated rack or drawer divider. This one change alone eliminates the avalanche effect most people experience when opening a cabinet. If you own glass storage jars alongside lidded containers, group them by function — jars for dry goods, rectangular containers for leftovers — and label shelves accordingly. Done right, you should be able to grab any piece in under five seconds without disturbing the rest of the stack.
This guide covers every practical method, from cabinet layout and drawer organization to which containers are worth keeping and which are just eating up space.
Start With a Full Audit Before You Organize Anything
Organizing a jumbled cabinet without first editing what's inside it is one of the most common mistakes people make. Before you touch a single container, pull everything out onto a counter and do a hard assessment.
What to Keep and What to Toss
Glass containers last for years, but lids do not. Lids crack, warp, and lose their seal long before the glass itself shows any wear. During your audit, match every lid to its container. Any lid without a container goes immediately. Any container without a matching lid gets evaluated — if it can be used as a bowl, a glass storage jar for dry goods, or a dish for leftovers without a lid, keep it. Otherwise, let it go.
- Lids that are cracked, warped, or no longer snap closed — discard
- Containers with chips along the rim — discard (chipped glass is a safety issue)
- Duplicate sizes you genuinely never use — donate
- Containers with staining or strong odor absorption — usually a sign the seal is compromised
- Glass storage jars with rusted or damaged metal lids — replace the lid rather than discard the jar
Most households end up discarding 20–35% of what they pull out during this step. That reduction alone makes organizing far easier.
Categorize Before You Put Anything Back
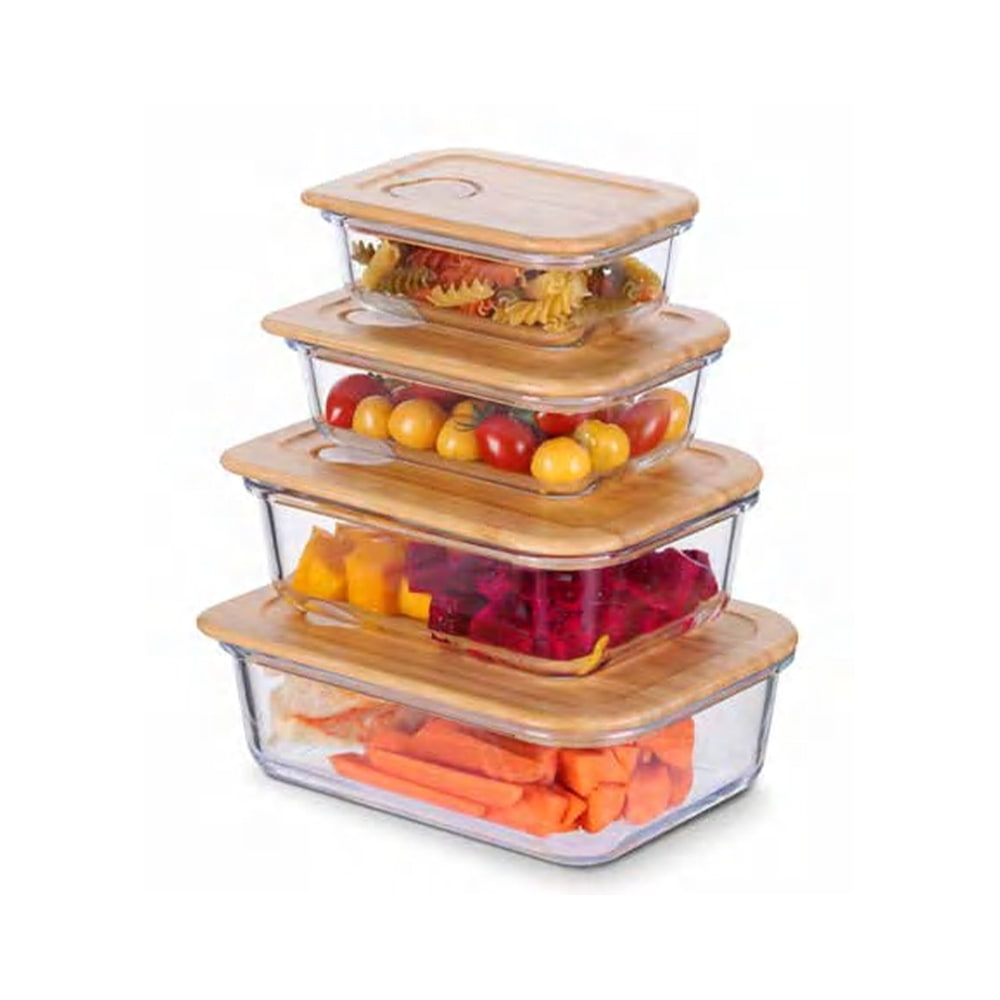
Once you know what's staying, sort into groups: small containers (under 2 cups), medium containers (2–4 cups), large containers (4 cups and up), round glass storage jars, and specialty shapes like rectangular meal prep containers or shallow baking dishes with lids. Keep all lids together in one pile for now.
This grouping step is what allows the actual organization system to hold up over time. If you skip it and just stack things back by feel, the cabinet returns to chaos within two weeks.
The Three Main Methods for Organizing Glass Containers in a Cabinet
There is no single right method. The best approach depends on how much cabinet space you have, how many containers you own, and whether you're working with deep shelves, shallow shelves, or a mix. Below are the three methods that consistently work in real kitchens.
Method 1: Nest Containers, Store Lids Separately
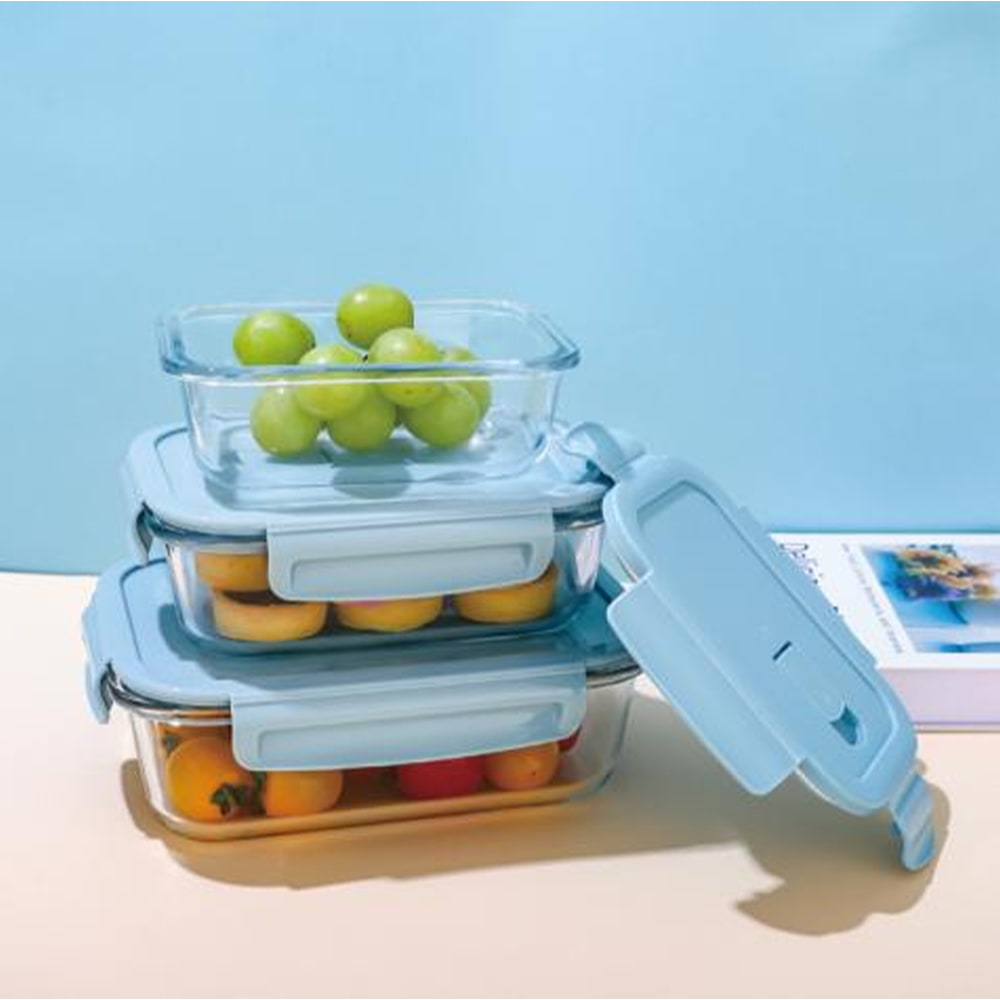
This is the most widely recommended approach and works well for collections of 10 or more containers. Nest containers of the same shape together by size — smallest inside medium inside large — and store all lids upright in a vertical organizer, a deep drawer divider, or a repurposed file organizer placed at the front of the shelf.
The key detail most people miss: lids stored flat take up three to four times the vertical space of lids stored on their edge. A standard 12-inch-deep cabinet shelf can hold 8–10 lids standing upright in a $12 organizer, compared to only 2–3 lids lying flat in the same footprint.
Glass storage jars with screw-top lids are the exception here — their lids stay attached during storage since they don't nest and the lid-jar connection is part of what keeps the jar stable on a shelf.
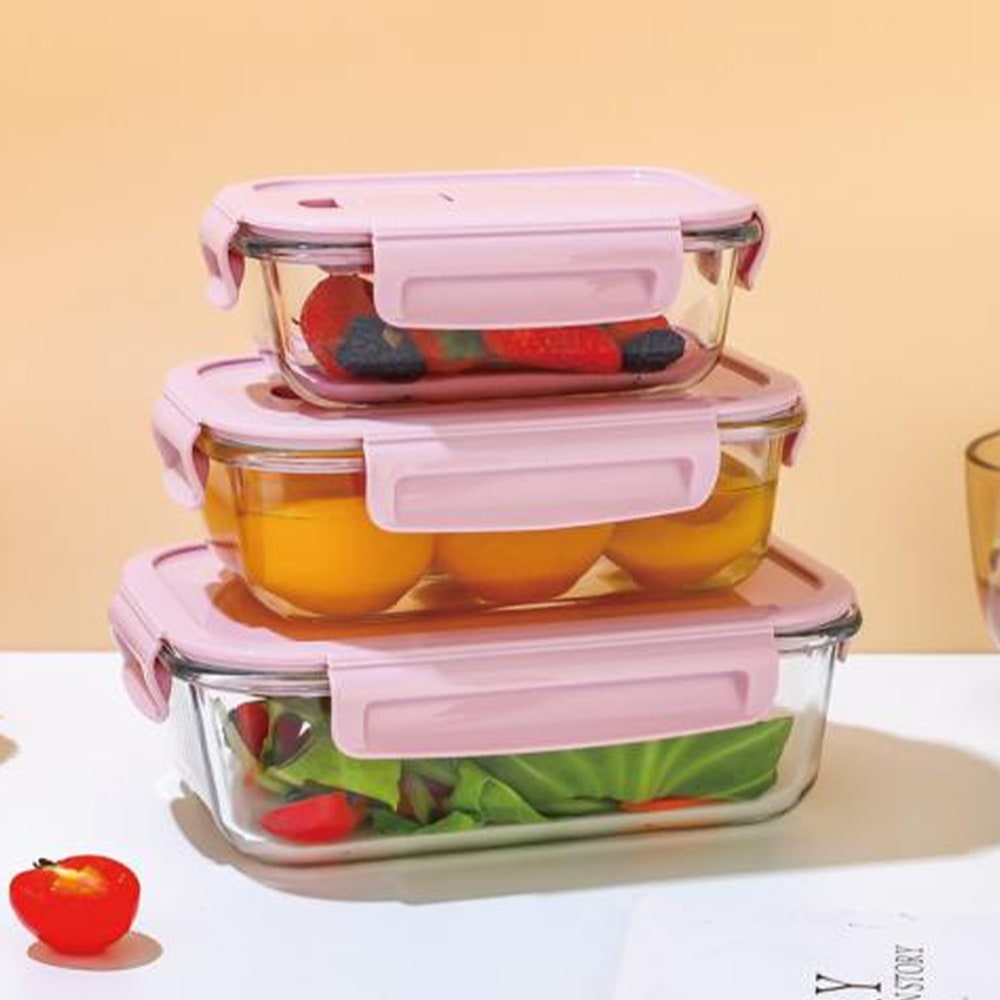
Method 2: Store Containers With Lids On
For smaller collections of under 8 containers, or for households where cabinet space is generous, storing each container with its lid attached is perfectly functional. The downside is that it prevents nesting, so each container takes up its full footprint. This method works best when containers are sorted by size and placed in a single row rather than stacked.
If you go this route, pull-out cabinet shelf inserts dramatically improve access. Containers stored 12 inches deep in a fixed shelf are easy to forget — pull-out shelves make everything visible and reachable.
Method 3: Dedicated Zones by Container Type
Households that mix different container formats — round glass storage jars for pantry ingredients, rectangular containers for leftovers, shallow containers for produce — benefit from a zone-based approach. Assign each type its own shelf or cabinet section and store each zone using Method 1 or 2.
The advantage of zone-based organizing is that it scales well as your collection grows. Adding a few new glass storage jars doesn't destabilize the leftover container section.
Comparing Organization Methods at a Glance
| Method | Best For | Space Efficiency | Ease of Access | Main Drawback |
|---|---|---|---|---|
| Nest + Separate Lids | Large collections, small cabinets | High | Good | Lids can still get disorganized |
| Lids On, Single Row | Small collections, generous space | Low | Excellent | Space-hungry |
| Zone-Based | Mixed formats (jars + containers) | Medium | Excellent | Requires more dedicated cabinet space |
How to Organize Glass Storage Jars Specifically
Glass storage jars — whether wide-mouth mason jars, hinged-lid glass jars, or round canister-style jars — follow different organizational logic than lidded meal prep containers. Because they stand upright and the lid stays with the jar, the main challenge is shelf visibility and access, not lid management.
Pantry Shelf Organization for Glass Storage Jars
The single most effective tool for pantry jar organization is a tiered shelf riser. A two-tier riser on a 12-inch-deep shelf lets you see jars in both the front and back row clearly, doubling the functional capacity of that shelf space. Without a riser, jars in the back row tend to disappear from view and get forgotten.
Group glass storage jars by contents, not by jar size:
- Grains and legumes (rice, lentils, chickpeas) — these are dense and heavy, keep them at lower shelf heights
- Baking ingredients (flour, sugar, baking soda) — group together since they're used at the same time
- Nuts and seeds — often smaller jars, fit well on upper shelves or in the back row of a riser
- Spices in glass jars — best in a dedicated spice drawer or a separate tiered rack
- Snacks and dried fruit — mid-shelf at eye level for easy everyday access
Labeling Glass Storage Jars
Labeling is non-negotiable for a functional glass jar pantry. Because glass is transparent, it's tempting to skip labels — but once you have 15+ jars, visual identification from a distance becomes unreliable. Flour and white sugar look identical. Quinoa and millet look nearly identical. Chia seeds and poppy seeds are nearly indistinguishable.
Labeling options in order of practicality:
- Chalkboard labels with a chalk pen — reusable, aesthetically clean, easy to update
- White label tape with a label maker — extremely legible, durable, slightly more permanent
- Washi tape with a permanent marker — inexpensive, removable, works fine for stable pantry items
- Directly on the lid — useful for spice jars viewed from above in a drawer
Include the item name and, where relevant, the purchase or fill date. For items with shorter shelf lives like nuts and whole grain flours, this prevents discovering rancid contents months later.
Sizing Consistency Makes a Large Difference
One of the most practical upgrades for anyone organizing a glass storage jar pantry is moving toward size-consistent jars. Mixed jar sizes — some squat, some tall, some round, some hexagonal — make shelves look and function chaotically. When jars share the same diameter, they line up cleanly, stack when needed, and allow for much tighter packing on tiered shelves.
Wide-mouth jars in two or three sizes (for example, 16 oz, 32 oz, and 64 oz) cover the majority of pantry storage needs. Standardizing your glass storage jar collection to these sizes can reduce wasted shelf space by up to 40% compared to a mixed collection of irregular shapes.
Cabinet-Specific Tips That Make the System Stick
The organizational method you choose matters less than how well it fits the physical reality of your cabinet. Here are adjustments that address the most common cabinet types.
Deep Cabinets (Over 15 Inches Deep)
Deep cabinets are the enemy of glass container organization. Anything stored beyond 10–12 inches from the front of the shelf effectively disappears from daily use. The fix is to add pull-out shelf organizers, which transform a 20-inch-deep cabinet into something fully functional. Pull-out inserts run between $25 and $60 for most standard cabinet widths and require no tools or drilling if you use tension-mount versions.
Alternatively, a lazy Susan (turntable) works well for deep corner cabinets or round glass storage jars — a single spin brings the back of the shelf to the front.
Shallow Cabinets (Under 12 Inches Deep)
Shallow cabinets naturally limit stacking depth, which actually makes glass container organization easier. Single-row storage with lids attached works well here. The main issue is usually height — glass containers with their lids on can be 5–7 inches tall, which limits how many rows you can stack vertically without a shelf riser to create a second tier.
Drawer Storage for Containers and Lids
If you have a deep kitchen drawer — 20 inches or deeper is ideal — storing containers flat in a single layer with lids stacked alongside them is one of the cleanest organizational solutions available. Drawer organizers with adjustable dividers allow you to customize compartments for different container sizes. Glass storage jars do not typically store well in drawers due to their height, but flat containers with snap-on lids are ideal for this format.
Under-Sink or Pantry Overflow Storage
If your glass container collection exceeds your primary cabinet space, designate an overflow zone in a pantry, lower cabinet, or even a shelf in a utility closet. Store less-frequently used pieces here — large glass storage jars for bulk items, oversized containers for entertaining — and keep everyday containers in the primary cabinet. Mixing high-frequency and low-frequency pieces in the same space is one of the main reasons cabinets stay disorganized.
Habits That Keep Glass Tupperware Organized Long-Term
Any organizational system fails without consistent maintenance habits. The good news is that glass container organization requires fewer ongoing habits than most people expect — the structure itself does most of the work.
The One-In-One-Out Rule
Before adding any new glass container or glass storage jar to your collection, identify what's leaving. This rule prevents gradual accumulation that eventually overwhelms the system. It's particularly important with glass storage jars, which are easy to acquire — buying pasta or honey in a glass jar adds to your collection whether you plan it or not. Keep a discard box in the cabinet or nearby so that unwanted pieces are removed the same day rather than lingering.
Quarterly Lid Audits
Lids degrade faster than the containers they cover. Every three months, do a quick check: snap every lid onto its container and test the seal. Lids that no longer close properly or that have visible warping should be replaced rather than tolerated. Living with a poorly sealing lid means your food isn't protected and the container is taking up space without serving its purpose.
Return-to-Home Discipline
The system only works if items always return to the same spot. The most common failure mode for kitchen organization is containers being returned to the "closest available space" after washing rather than their designated spot. This is especially common when multiple people use the kitchen. Clear labeling of shelves or zones — even just a small piece of tape indicating "small lids" or "large containers" — reduces misplacement significantly.
Handle Glass Storage Jars and Containers at the Same Time
If you use glass storage jars for pantry storage and lidded glass containers for meal prep, organize both categories on the same day. Trying to manage them separately, on different schedules, creates imbalance in the system — you end up with an overflowing pantry section and an underused container cabinet, or vice versa. Organizing as a unified kitchen storage system produces better results than managing each piece of it independently.
The Best Organizer Tools for Glass Containers and Jars
You do not need to buy a lot of additional products to organize glass containers well, but a few targeted tools make a significant difference in how well the system holds up over time.
Vertical Lid Organizers
These are the single most useful purchase for anyone organizing glass tupperware. A vertical lid organizer — essentially a series of parallel slots designed to hold lids upright — eliminates the flat-stacking problem that makes lid retrieval frustrating. Prices range from $8 to $20. Look for organizers with adjustable slot widths to accommodate both small and large lids, and choose a model that can be anchored or weighted so it doesn't tip when you pull a lid out.
Tiered Shelf Risers
Tiered risers work for both glass storage jars and stacked containers. For jars, a two-tier riser on a pantry shelf increases visible capacity from one row to two rows without adding a single additional shelf. For containers, a riser allows you to see stacks in the back without removing anything from the front. Bamboo, wire, and acrylic versions are all functional — choose based on your shelf depth and aesthetic preference.
Turntable (Lazy Susan)
Ideal for corner cabinets and deep shelves storing glass storage jars. A 12-inch turntable fits most standard cabinet depths and can hold 8–12 medium jars depending on jar diameter. Opt for a turntable with a raised edge to prevent jars from sliding off when spun.
Drawer Dividers
For flat container storage in drawers, adjustable bamboo or acrylic drawer dividers let you create custom-sized compartments for different container dimensions. The adjustable format is important — fixed-size drawer organizers rarely fit your exact containers precisely, leaving dead space that gradually fills with misplaced items.
Labels and Label Makers
For glass storage jars especially, a label maker is worth the $25–$40 investment. Hand-written labels on tape work but look inconsistent and can be hard to read quickly. A label maker produces uniform, clear labels that hold up to light moisture exposure and remain legible even on curved glass surfaces.
Common Organizing Mistakes and How to Avoid Them
Most kitchen organization problems come from a handful of repeated mistakes rather than fundamentally flawed systems. Recognizing these patterns helps you avoid them.
- Keeping mismatched containers out of guilt: Glass containers are durable and represent a real purchase cost, which makes it hard to discard them. But a container without a matching lid, or a glass storage jar whose seal no longer functions properly, is not serving any storage purpose. It's occupying space that a functional piece could use.
- Over-purchasing before establishing a system: It's tempting to buy an entire matching set of new glass containers before figuring out what you actually need. Most households find they need far fewer containers than they think — typically 6–8 meal prep containers and 6–10 glass storage jars covers the majority of food storage needs for a family of four.
- Stacking containers more than three high: Stacks of four or more glass containers become unstable and require you to remove everything to get to the bottom container. Keep stacks to three maximum, and place the container you use most frequently on top.
- Mixing plastic and glass in the same zone: Plastic and glass containers have different dimensions and don't nest together cleanly. Mixing them in the same shelf section creates visual and physical chaos. If you use both, give each its own section.
- Ignoring depth variation between cabinets: Applying the same organizational approach to a 10-inch-deep cabinet and a 20-inch-deep cabinet produces very different results. Assess each cabinet independently and choose the method that fits its actual dimensions.
Organizing Glass Containers in the Refrigerator and Freezer
Organization doesn't stop at the cabinet. How you store glass containers in the refrigerator significantly affects how often food gets used before it spoils — and how easy it is to find what you're looking for without unloading half the fridge.
Refrigerator Shelf Zones
Assign dedicated refrigerator zones to different food types and store glass containers within those zones consistently:
- Top shelf: ready-to-eat meals, leftovers in lidded containers — the things you need to reach first
- Middle shelf: meal prep containers, prepped ingredients, glass storage jars of sauces or condiments in active use
- Lower shelf: raw proteins, items being defrosted — kept away from ready-to-eat food
- Door shelves: smaller glass storage jars for condiments, dressings, and items used frequently
A consistent zone system means you always know where to look, which reduces the amount of time the refrigerator door stays open — a practical benefit that also saves energy.
Glass Containers in the Freezer
Not all glass containers are freezer-safe — this is especially important for glass storage jars. Wide-mouth jars are generally safer for freezing than narrow-mouth jars because they allow for liquid expansion without cracking the glass. Always leave at least one inch of headspace when freezing liquids in glass containers. Failing to do so is the most common cause of broken glass in the freezer.
In the freezer, label containers with both contents and freeze date using freezer-safe labels or masking tape with a permanent marker. Glass containers frozen solid can be difficult to identify by sight alone, and unlabeled containers tend to stay in the freezer indefinitely.
What Size and Style of Glass Container to Keep in Your Collection
A streamlined, well-chosen collection is easier to organize than a large, varied one. Here are the sizes and styles that cover most household food storage needs without excess.
For Meal Prep and Leftovers
Rectangular glass containers with locking lids are the workhorses of kitchen storage. A set of three sizes — approximately 1 cup, 2 cups, and 4 cups — handles individual portions, meal prep, and larger batch storage. Round containers are less space-efficient in the refrigerator but work well for soups, sauces, and round foods.
For Pantry and Dry Goods
Glass storage jars in three sizes cover the full range of pantry ingredients. A 500 ml (about 16 oz) jar is ideal for spices, small quantities of baking ingredients, nuts, and seeds. A 1 liter (about 32 oz) jar works for medium quantities of grains, legumes, and pasta. A 2 liter (about 64 oz) jar handles bulk purchases of rice, flour, oats, and sugar. For most households, 4–6 jars of each size provides enough capacity without overstocking.
Specialty Formats Worth Having
A shallow glass container with a lid — sometimes called a glass baking dish with lid — serves double duty as both a storage container and an oven-safe baking vessel. This format is worth keeping in the collection even if it doesn't nest efficiently, because its dual function saves cabinet space elsewhere.
Recommended Products


")


- PRODUCT
- Glass Storage Jar
- Glass/Stainless Steel Drinking ware
- Kitchen Seasoning Containers
- Home Decoration
- QUICK LINKS
- Products
- About Us
- Manufacture
- ODM/OEM
- News
- Contact Us
- CONTACT US
-
-
 7 Crystal Boulevard xi’an Feng Town, Baoying County,Jiangsu, China.
 -
 WhatsApp: +86-18083783456
 -
 +86-18083766162
+86-18083783456
+86-15895746638
+86-0514-8866-8898
-
 julia@nchousewares.com
Jack@nchousewares.com
-
- CONTACT

